Sunday, April 26, 2020
Friday, April 24, 2020
10 Hours of Coding-Intro to JS: Drawing and Animation-Part 5
In this hour I completed the lesson of "Variables." I finished
the Funky Frog challenge.
I learned how to use the "var" code in more depth but this time
it was for changing the position and not the size. It can be used for the values of x and y as seen in the code below. I used this for the frog so I could move the whole thing at once instead of having to move each part of the frog.
In the next hour I will be starting the "Animation Basics" lesson.
| |
|---|---|
10 Hours of Coding-Intro to JS: Drawing and Animation-Part 4
Today I started the lesson of "Variables." I finished
the Bucktooth Bunny challenge.
I learned how to use the "var" code. This makes it easier to change
the size of certain shapes with one command. I used it to change the eye sizes and the teeth sizes. For the eye size I used "var eyeSize" then "eyeSize = 40" For the teeth I did "var toothSize" and "toothSize = 60".
In the next hour I will be finishing the "Variables" lesson. The
last challenge in this lesson is "Funky Frog."
| |
|---|---|
Thursday, April 23, 2020
10 Hours of Coding-Intro to JS: Drawing and Animation-Part 3
Today I completed the lesson of"Colouring."
I didn't learn any new code but perfected the ones I learned in the previous lesson.
I used my skills from the previous lesson which were
how to use the "fill" which is used to add colour
to the different shapes, how to use "strokeWeight"
to adjust the thickness of the shape. Also I used "background" which
adds a rectangle that covers the whole box.
In the next hour I will be working on the "Variables" lesson. The
first challenge in this lesson is "Bucktooth Bunny"
| |
|---|---|
Thursday, April 16, 2020
10 Hours of Coding-Intro to JS: Drawing and Animation-Part 2
Today I completed part of the next lesson which
is "Colouring." I learned how to use code to fill in
shapes and adjust the thickness of them as well.
I learned how to use the "fill" which is used to add colour
to the different shapes. I also learned how to use "strokeWeight"
to adjust the thickness of the shape. Also I used "background" which
adds a rectangle that covers the whole box.
In the next hour I will be finishing the "Colouring" lesson. The
final project in this lesson is "What's for Dinner?"
| |
|---|---|
|
|
|
Wednesday, April 15, 2020
10 Hours of Coding-Intro to JS: Drawing and Animation-Part 1
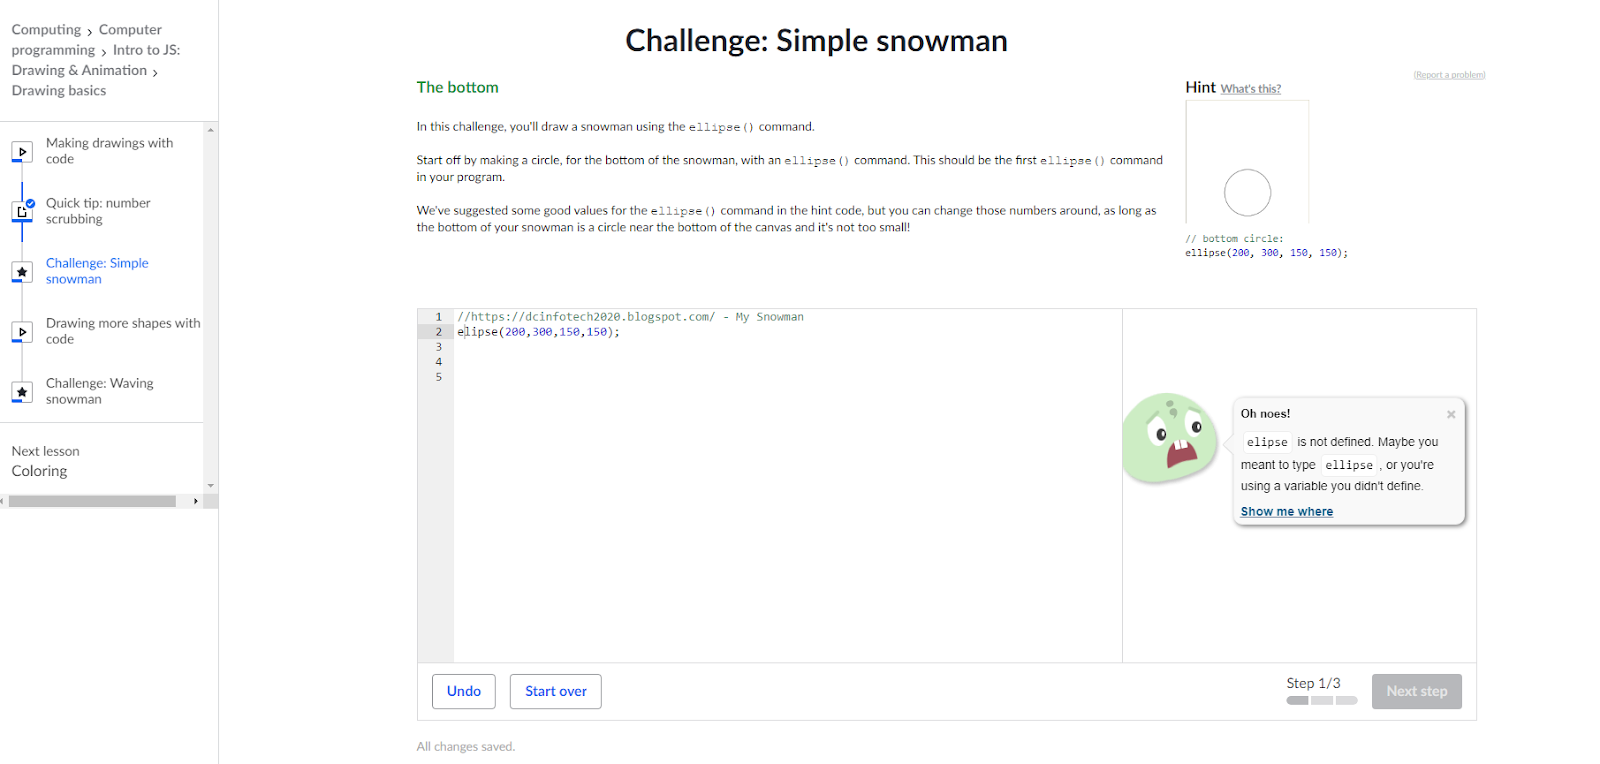
| Intro to JS: Drawing and Animation I chose Khan Academy and the course I chose is "Intro to JS: Drawing and Animation." I completed the first lesson which was "Drawing basics." I learned how to use code to create drawings and shapes. I learned how to use the "ellipse" code to create circular shapes. Also, I learned to use "rect" to make rectangular and square shapes. Lastly, I learned how to use "line" to create lines. With these commands I ended up creating a snowman and later a snowman waving. In the next hour I am going to work on the second lesson which is "Colouring with Code." In this lesson I will learn how to add colour with code. | |
|---|---|
| Starting my first project: The Simple Snowman | I made my first mistake which was an easy fix. |
I finished the Simple Snowman.
|
I decided the snowman was to simple so I added some buttons.
|
| This is the finished version of my waving snowman. I added some colour to the ground. | |
Monday, March 9, 2020
Morphing: Animal Skin Wrap #3
| Lebron James | Layers #1 | Layers #2 |
|---|---|---|
| Alligator | Canteloupe | Strawberry |
| Transformed LeBron James | ||
| Pole | Column | Grass Field |
Steps
1. I selected a Canteloupe, an alligator skin and LeBron James2. Open the LeBron-mask it out then "place embedded" the Canteloupe, mask it out Use opacity on the Canteloupe get the same size the two items. Try to match body parts. Do the same for alligator skin and strawberry texture. 3. Choose Filter, Liquify when on the Canteloupe layer. Make sure to checkbox Show Backdrop. Then use: drop-down to Lebron. I adjusted the opacity to see both around 50%. Then I warped the canteloupe to match Lebron's face. Parts that stick out too much are removed later. Do the same for alligator skin and strawberry texture 4. Then CTRL click the Lebron MASK then paint on the canteloupe MASK. After that I chose SHIIFT-CTRL-I then painted with white around the Canteloupe to remove the extra parts. On the Canteloupe layer I chose the blending option 'multiply' Then I added a new Adjustment Layer Brightness/contrast 5. I did the same steps to the rest of his face and added other materials like alligator skin and strawberry. 6.Then I selected all my layers and duplicated them then merged them so I can add the background in and only have to show 1 layer rather than a bunch. 7.Add Watermark | ||
Subscribe to:
Posts (Atom)